
Creditcoin 2.0+ | Nominator Staking Guide
Welcome to the official Creditcoin 2.0+ Nominator Staking Guide! We've written down (and recorded) everything you need to know to start nominating in this quick and easy guide.


Welcome to the official Creditcoin 2.0+ Nominator Staking Guide! We've written down (and recorded) everything you need to know to start nominating in this quick and easy guide. By participating as a nominator, you'll help secure the world's best RWA-focused blockchain network!
For a limited time during our 2.0+ mainnet launch, we're giving away free CTC (mainnet) tokens to encourage you to join our network and start staking. For the full details, read our full announcement post.

Starting Point for Staking on Creditcoin
Before you jump in and start nominating, you'll need CTC mainnet tokens. Complete the instructions below to join!
- Join our QuestN launch event 👉 Here
- Create A Substrate wallet 👉 Polkadot.js extension or for improved UX, use SubWallet
- Get staking! After you’ve received your freebie CTC mainnet Token, click here to go to the Staking Dashboard!
Once you get have your CTC tokens please remember to keep the following points in mind...
Never stake/bond all of your CTC tokens. Make sure you keep at least 0.1 for future transaction fees otherwise you won't be able to perform transactions.
Make sure you nominate multiple validators. This helps to ensure your nominations become active, otherwise you might miss out on rewards.
How to Start Nominating
Once you've got your token, it's time to jump in and start nominating using the staking dashboard. Make sure you only ever use the official link here: http://staking.creditcoin.org/
Video Guide
To simplify everything, our amazing community lead Josh has made a simple nomination guide video to walk you through all the steps needed to get started. Check it out:
(Update) This Nominator's Guide Video has been updated for Mainnet
For a detailed breakdown of each step, make sure you read on. The below steps are for the Polkadot.js extension. If you are using SubWallet instead, simply connect your wallet to the Staking Dashboard and the Nominating steps remain the same.
Step #1 : Network Selection
Remember, even if you’re creating your very first Polkadot.js wallet, you need to make sure to enable ‘Allow use on any chain’ as your Network option.

Switch the Network to Creditcoin in the Staking Dashboard UI (you can find this in the bottom left corner), and make sure to also pick RPC as the Connection Type.

Once everything is set up correctly, proceed by clicking the 'Connect' button on the upper right of your screen.

Step #2: Add your Favourite Validators
You need to Favourite some Validators to begin Staking. To add your Favourite Validators follow the instructions below 👇
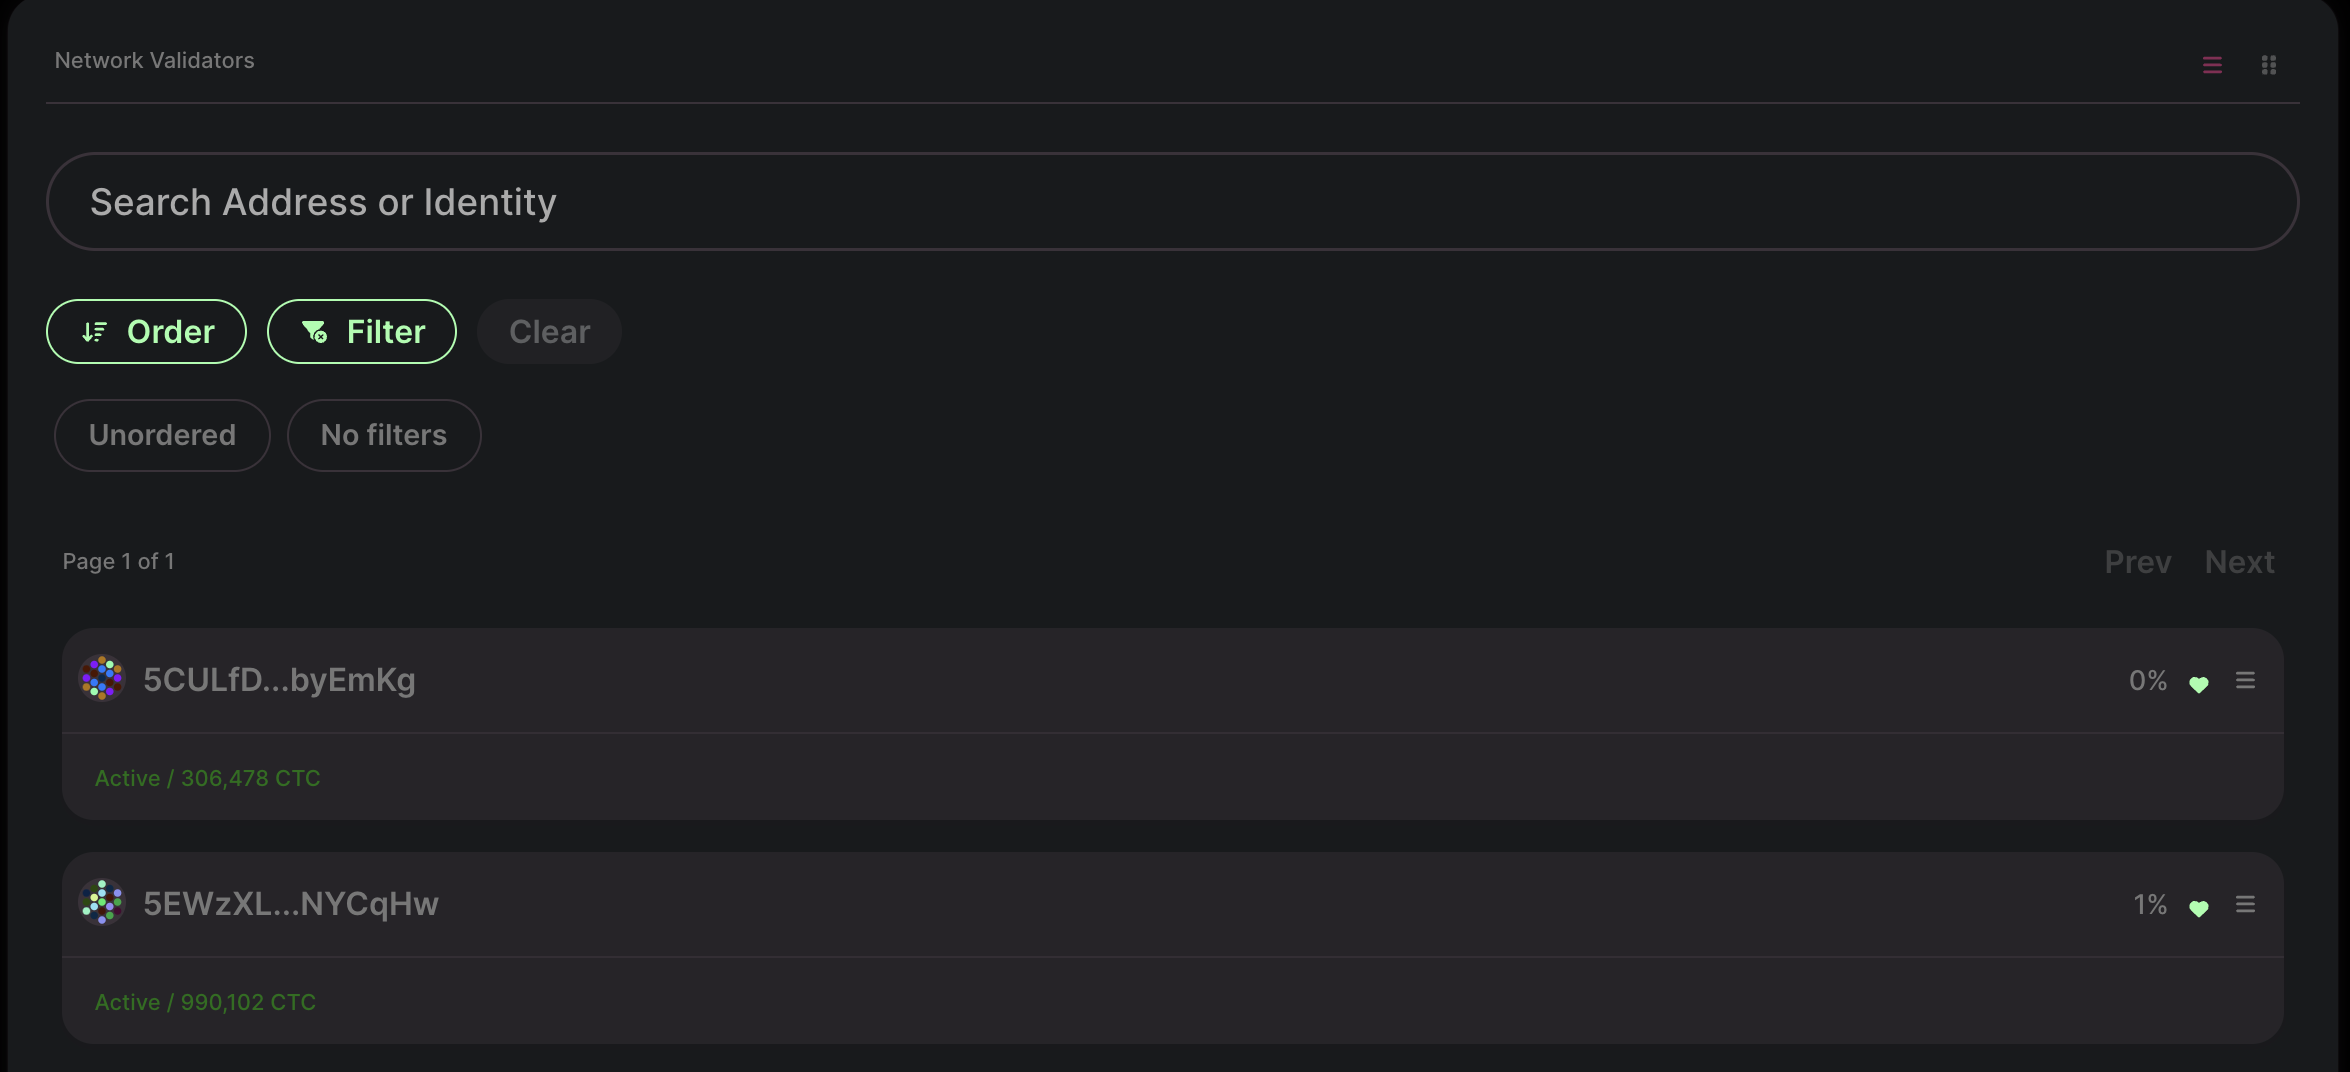
- On the Menu Tab, Click ‘Validators’.
- Some Validators should show up, if not, you can disable some of the Filters.
- Disabling all Filters by clicking 'Clear' should show all Validators; including Active and Inactive Validators.
- Click on the heart icon on the most right of the Validator’s UI to Favourite them. Once favourited, they will appear as a green 💚.
- Favourited Validators will show up as a nomination option within the ‘Nominate’ Tab when you’re trying to Stake CTC.
Please note: We strongly recommend favouriting/nominating multiple Validators in order to ensure that your nominations become 'active' and you earn rewards.
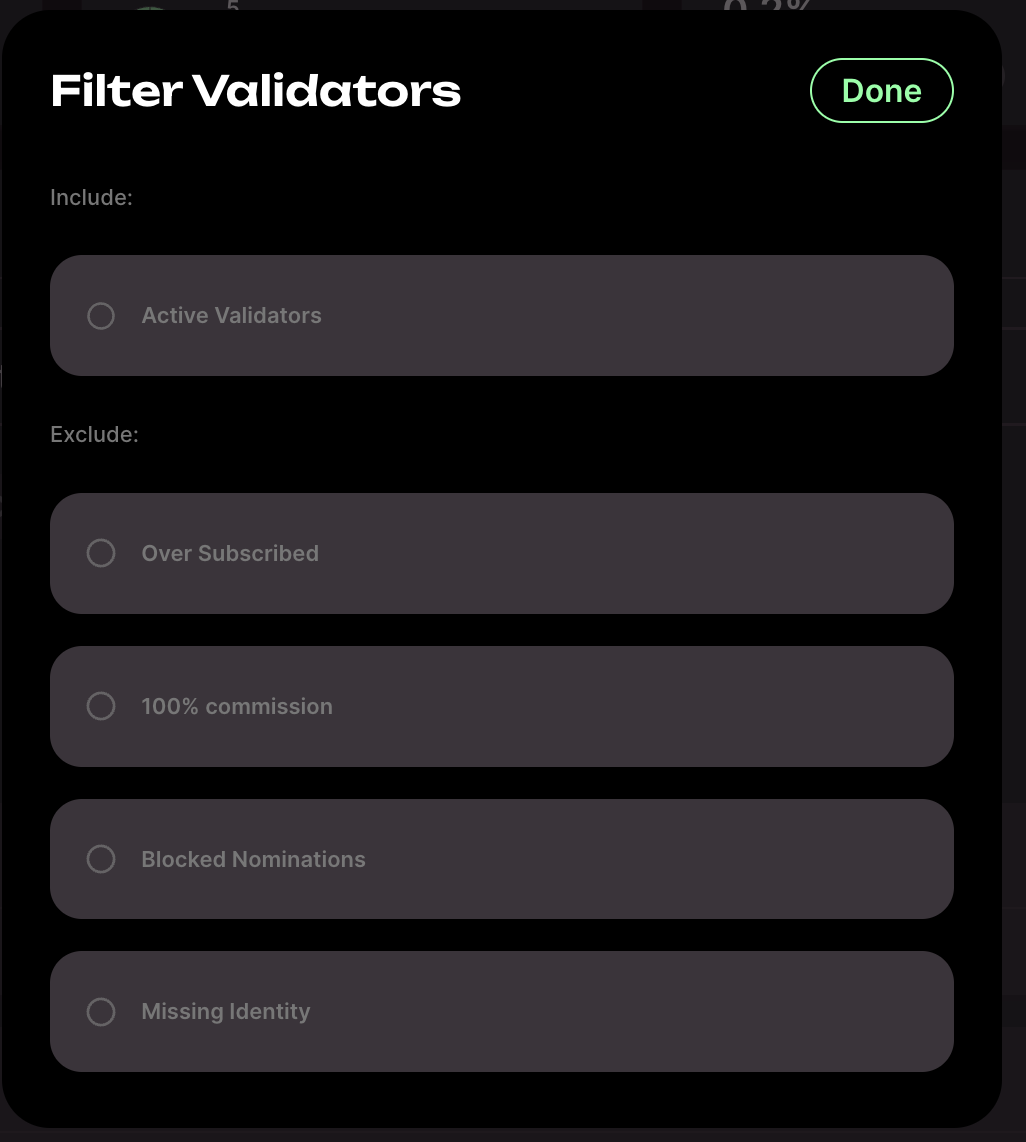
As shown in the image, you will have the option to clear all filters to see all available Validators. Feel free to pick whichever Validators you like:
- Active Validators: A validator that is actively validating blocks in the current era. Rewards are accumulated based on the validator's activity. A new set of validators are chosen for each era, so there is no guarantee that a currently active validator will be elected to be active in subsequent eras.
- Inactive Validators: A validator that was not elected to the current era and is not currently validating blocks. They may nevertheless still be elected to become active validators in the next era.
You can also filter Validators by various parameters by clicking 'Filter'.
Step #3: Start Nominating
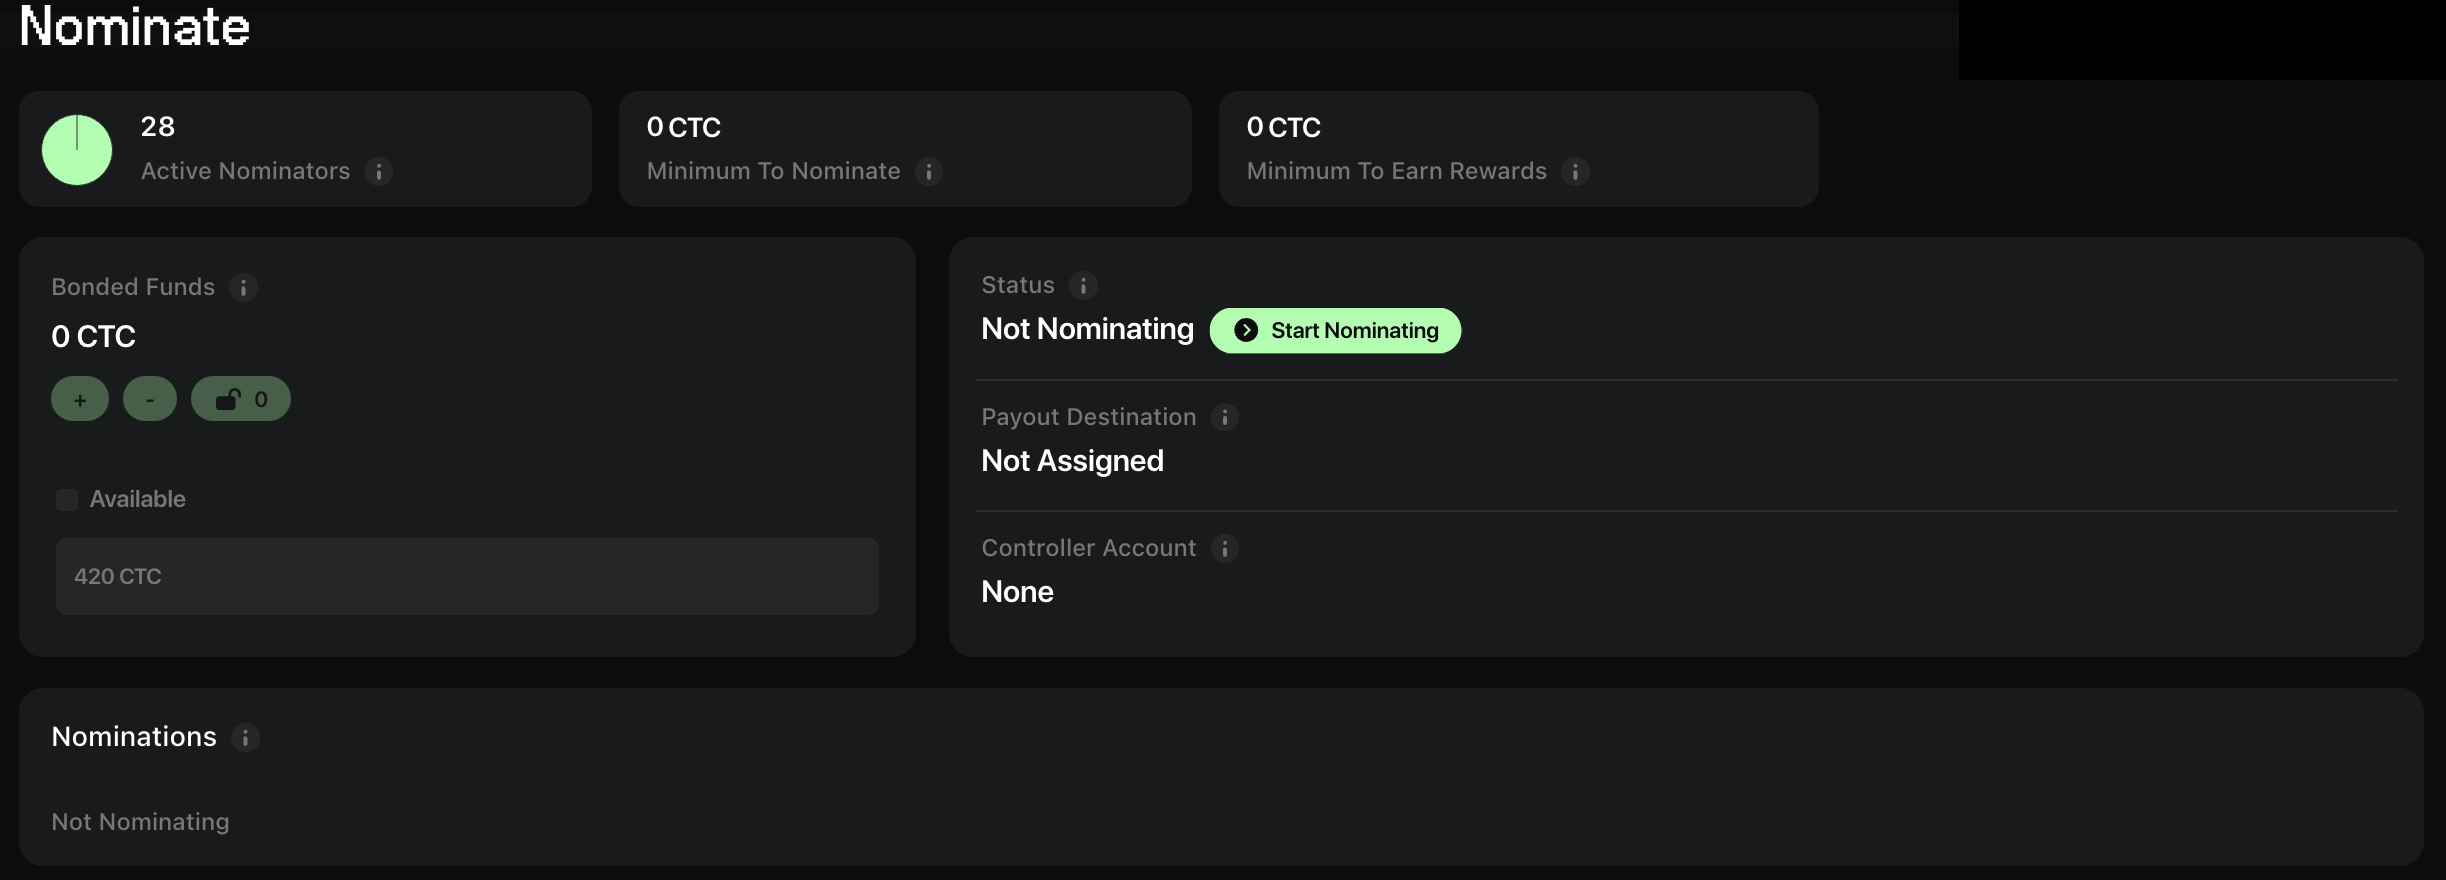
Once you’ve favourited your Validators, head back to the ‘Nominate’ page. Then follow the steps below:
- Click on ‘Start Nominating’
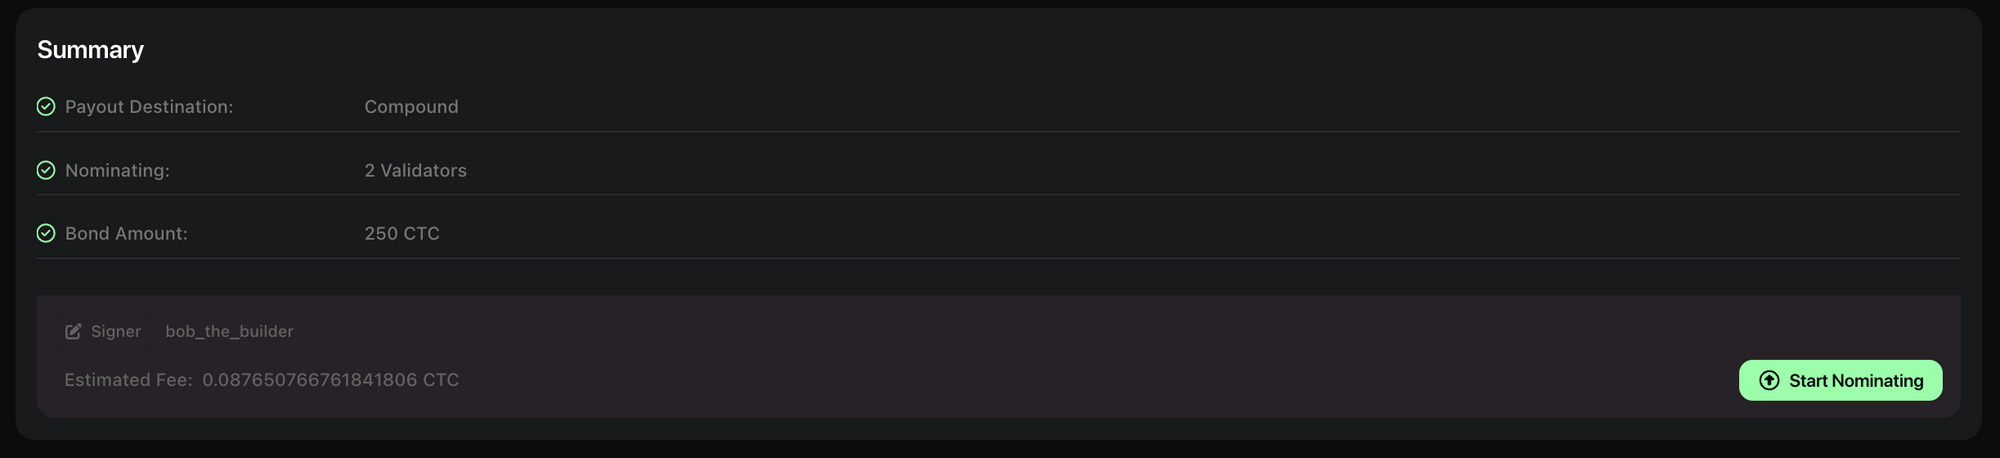
- Select your Payout Destination, in this tutorial, I am picking ‘Compound’.

- Choose your preferred nomination method. In this tutorial, we’ll be choosing manually ‘From Favourites’.

- Double check if your favourited Validators are the ones you would like to Nominate your CTC. Once you're happy, please press 'Continue'.

- Within the ‘Bond’, type in the amount of CTC you would like to Nominate. DO NOT select 'Max', as you need some free CTC to cover transaction fees.

- Finally, you will be able to see the Summary page before you click ‘Start Nominating’. Once ready, press 'Start Nominating' to proceed.
- That’s it! You should be taken back to the ‘Nominate’ dashboard showing ‘Waiting for Active Nominations’.

- Once the next era begins, you should begin actively nominating, and after another era, you'll begin earning rewards. An era takes 12 hours so this may take some time.
- If you've been successful your status should display “Nominating and Earning Rewards”. As a reminder, this can take over 24 hours to be reflected in the dashboard.

Understanding the Staking Dashboard UI
Once you've started nominating, you'll be able to access the rest of the dashboard features. Please consult this guide for explanations on how to interact with the rest of the Testnet Staking interface.
Bonded Funds UI
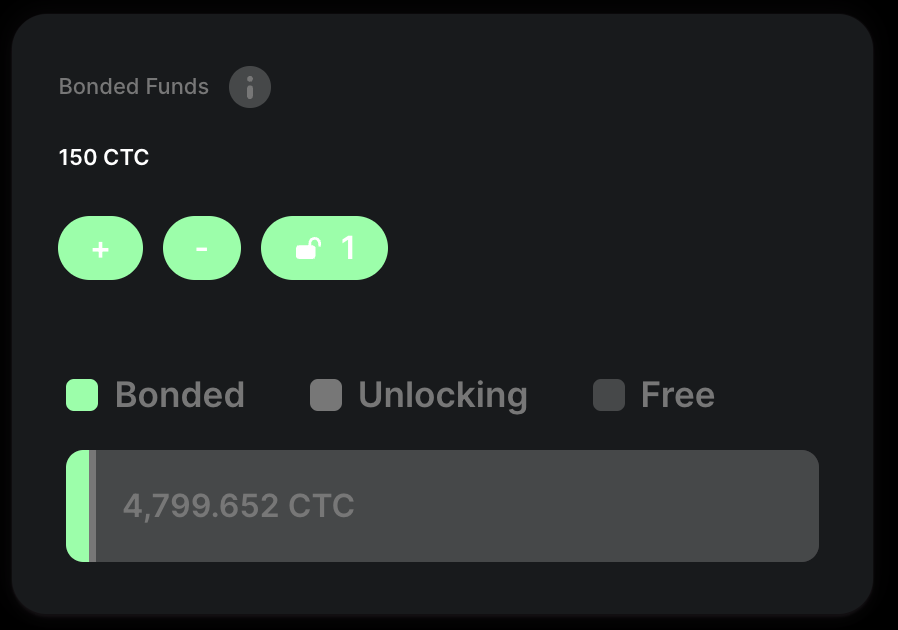
- Waiting for Active Nominations: If you want to add CTC, you can do so by clicking ‘➕’ in the Bonded Funds UI. Remember, you will be staking more CTC to the same Validators.
- Not Nominating: You can stake your first CTC.
- ➕ (Add to Bond) : You can stake more CTC by clicking ➕.

- ➖ (Remove Bond) : You can unstake your CTC by clicking ➖.
- 🔓 (Unlocks): You can see how long you need to wait until your Unbonded CTC fully unlock. You can also choose to Rebond it; Stake the CTC back.

After the Unlocking period has ended and your CTC is 'Unlocked', you can either:
- Click on ‘Rebond’ to restake the unlocked CTC
- Click ‘Withdraw Unlocked’ to release the Unlocked CTC back to your Wallet as Free CTC Balance

Free CTC vs Unbonded CTC Explained
- Free CTC is not the same as Unbonded CTC. You can stake the Free CTC and even transfer it out to another address.
You can always Stake back Unbonded CTC but you cannot transfer it out of your wallet until it is fully unlocked.

Unlocks UI Explained
Unlocked: The amount of unbonded CTC which is now ready for you to either withdraw or bond again.
Unbonding: The amount of CTC currently being unbonded into Unlocked CTC. It takes one week for bonded CTC to be unlocked via unbonding. You can also restake any currently unbonding CTC immediately.
Total: Total of both Unlocked and Unbonding CTC

Take note: Your funds will become available after 7 days if you choose to Remove Bond.
Payout Destination 👇🏻
You can update your Payout Destination anytime even if you chose the wrong Payout Destination option during Staking. Here's a quick explanation of what they all mean:
- Compound: Any earned rewards will be Bonded straight away to earn more CTC.
- To Your Account: Earned rewards will go straight into your linked wallet.
- To Another Account: Earned rewards will go straight into a manually selected wallet address.
- None: Do nothing. Your CTC rewards will remain stationary.
Bonded Funds:
- The Gas Fees are always paid from your own Account
- Do Not Stake All of your CTC in a single transaction. If you do, you won't have any CTC (gas) left to execute any more transactions, including withdrawals.

How do you know if you're doing it right? 👇🏻
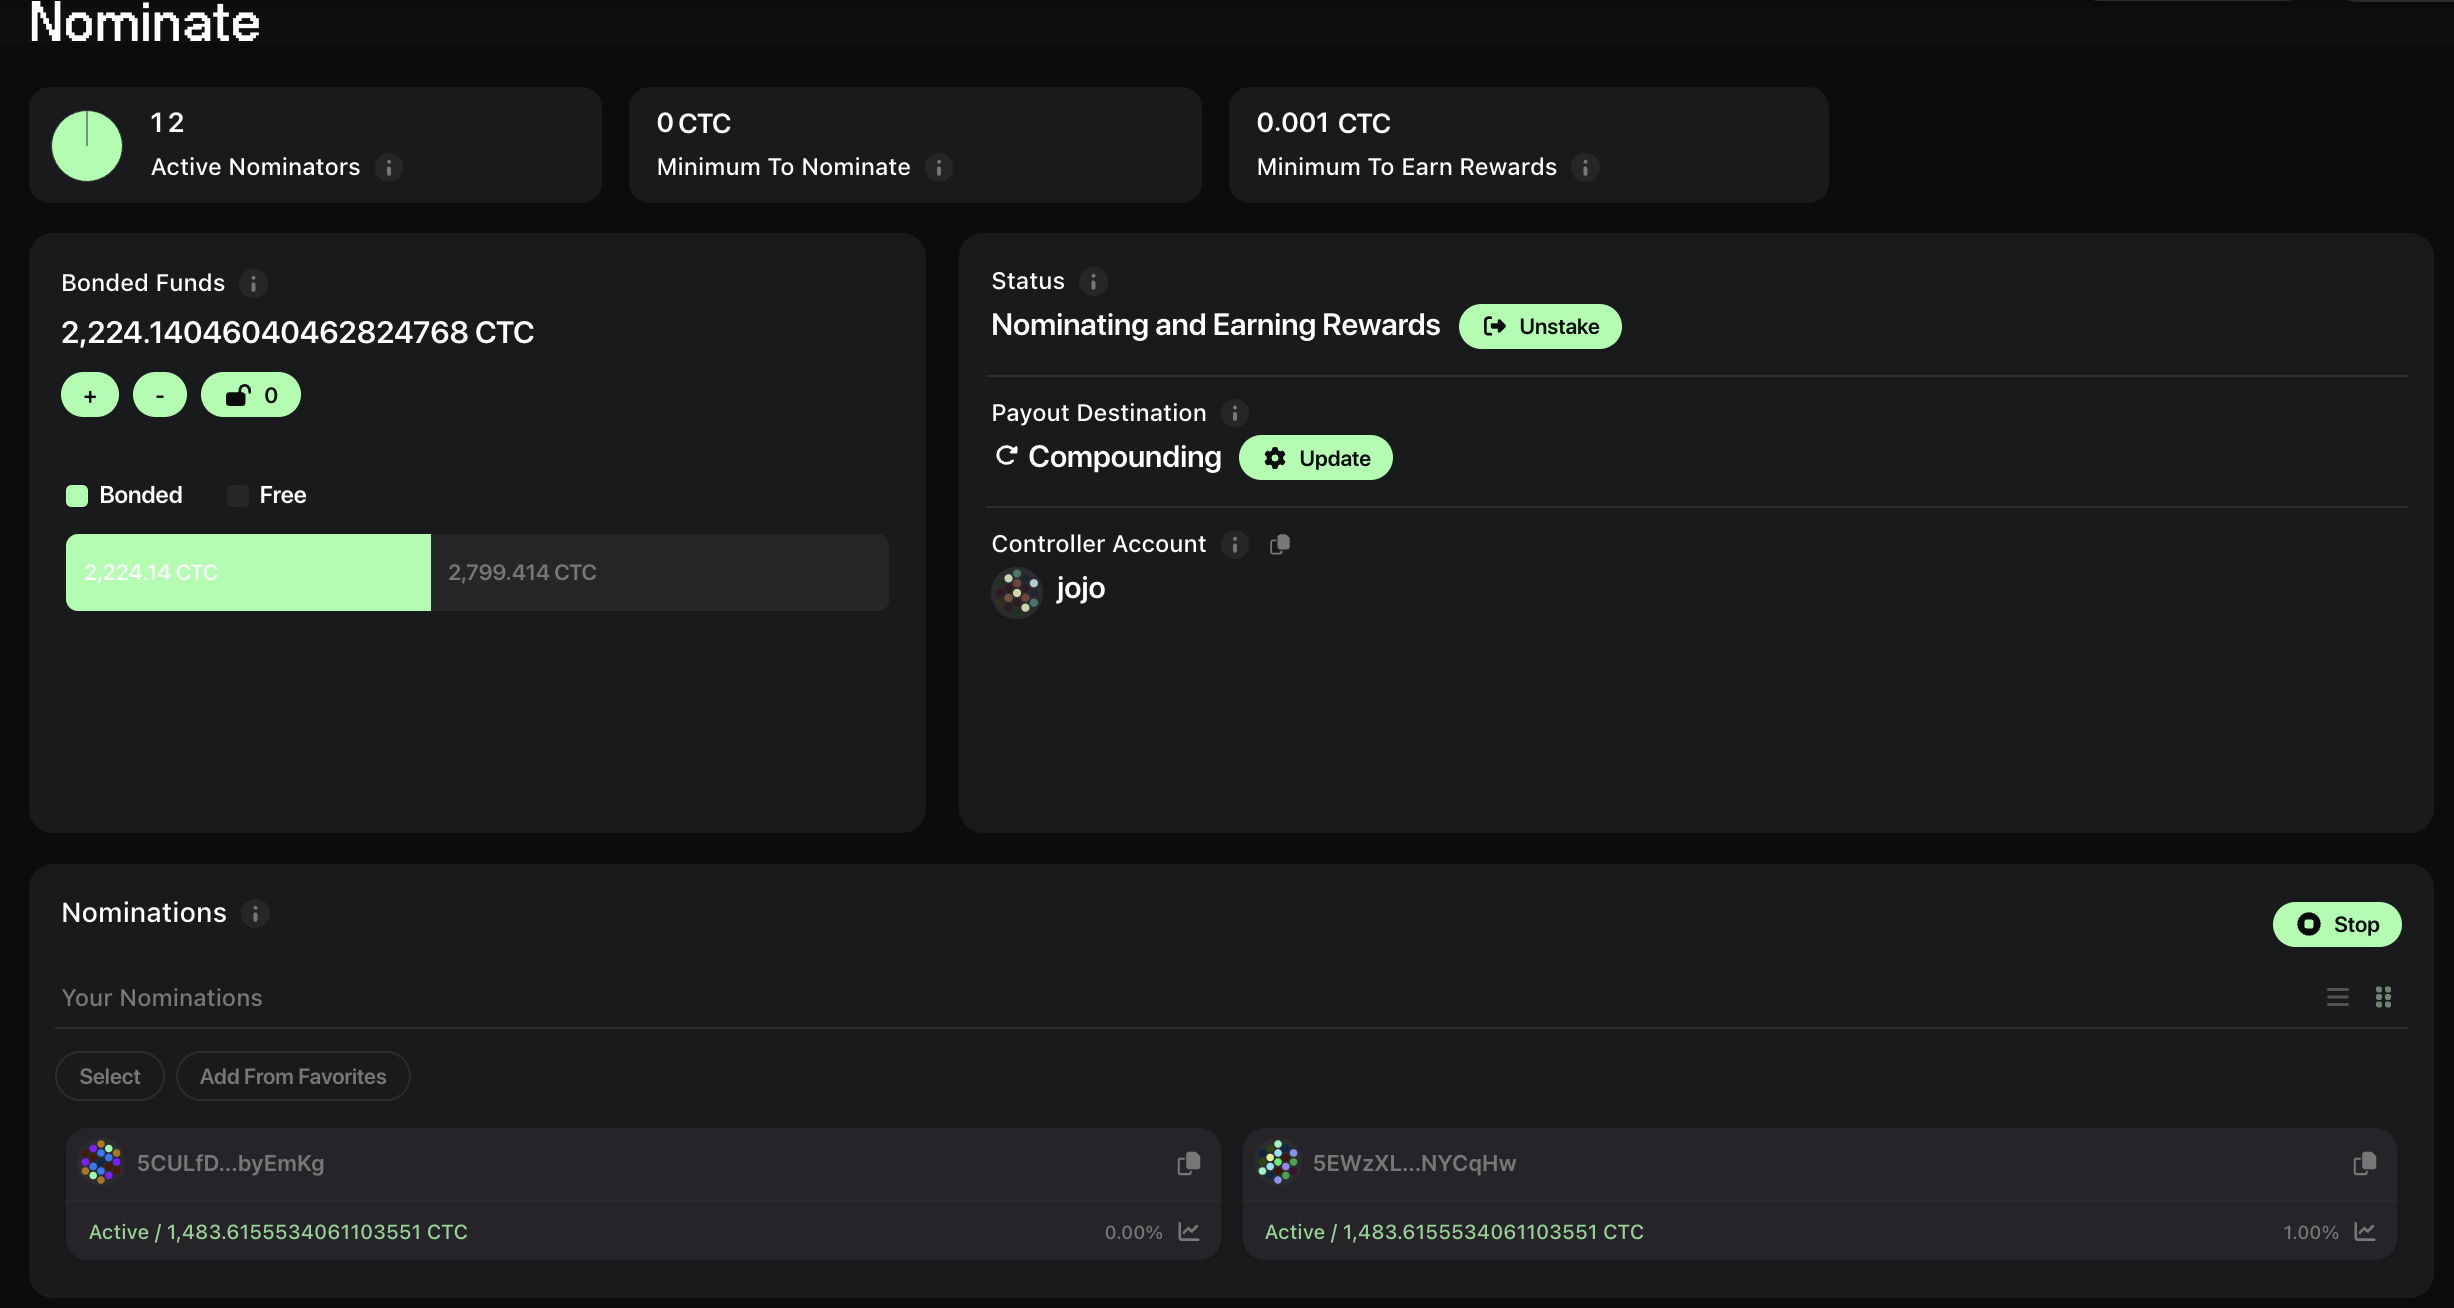
- Your Status changes to: Nominating and Earning Rewards
- You can see more CTC added to your Bonded Funds. (Depending on your Payout destination)
- You should see ‘Active’ status of your Favourited Validators within the Nomination Tab
- After nominating, please remember that you'll only start earning rewards when the next era begins (every 24 hours).
Quick Links
Official Website Links
Join Mainnet Launch Event
About Creditcoin
Creditcoin is a foundational L1 blockchain designed to match and record credit transactions, creating a public ledger of credit history and loan performance and paving the way for a new generation of interoperable cross-chain credit markets.
By working with technology partners, fintech lenders such as Aella, and other financial institutions across global emerging markets, Creditcoin is securing capital financing, building credit history and facilitating trust for millions of underserved financial customers and businesses based on the principles of RWA.
Website | Twitter | Discord | Medium | Youtube | Telegram(ANN) | Telegram(Community) | Whitepaper(ENG) | Opensea